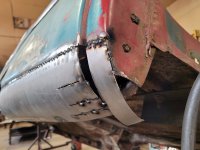
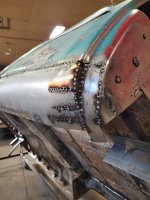
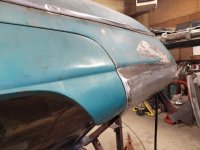
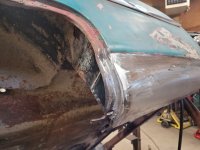
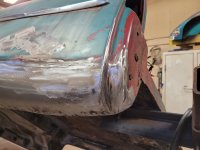
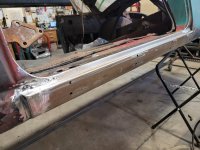
Finished the other side today. It was a little trickier as most of the shape was gone. I had to make templates from the other side. I'm happy with the result.

Navigation
Install the app
How to install the app on iOS
Follow along with the video below to see how to install our site as a web app on your home screen.

Note: This feature currently requires accessing the site using the built-in Safari browser.
More options
You are using an out of date browser. It may not display this or other websites correctly.
You should upgrade or use an alternative browser.
You should upgrade or use an alternative browser.
52 Lincoln Capri Build
- Thread starter ratrig
- Start date
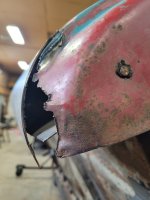
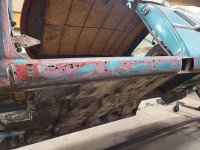
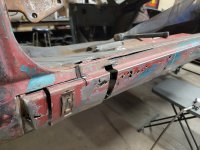
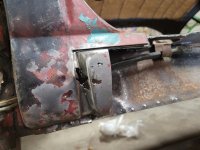
Now on to the drivers side rocker panel. I ordered one a year ago, had it sitting between the wheels on the lift and forgot about it ,proceeded to push the chassis off the lift (with some resistance ??) and flattened my $125 rocker panel .
So now I am going to try a recreate the panel in 2 pcs. wish me luck... If I fail I will just order another panel .")
So now I am going to try a recreate the panel in 2 pcs. wish me luck... If I fail I will just order another panel .
Attachments

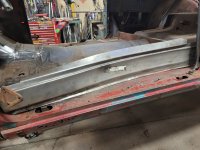
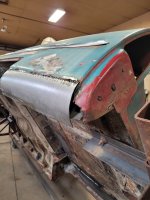
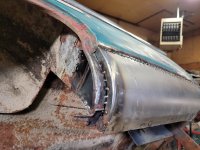
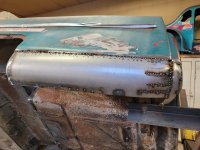
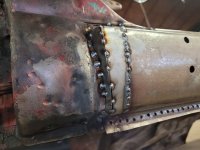
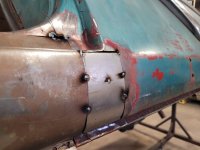
Well, I tried to recreate the 45" rocker panel in 2 pcs cause my roller is only 36" wide, made one pc and it was close but realized to make a 2nd exactly the same would be hard to do. So I ordered another 52-54 Merc panel to use. When I got the panel it wasn't exactly right and had to massage it anyway. Back to watching YouTube vids on how to hammer shape metal. Shout out to James WC for mentioning https://www.youtube.com/c/MakeItKustom a self taught metal guy and awesome teacher who has helped me tremendously along with other videos.
Attachments


John in Oz
Well-Known Member
That is going to be an amazing ride when you are done, nice work there.
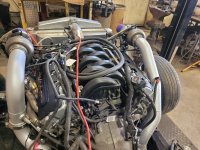
I finally have a video of the first start up of the engine gone public on you tube to see. My brother edited it combining his footage and mine scrapping all the babble no one wants to hear lol. It results in a very short clip. A very exciting moment for me as the engine was unknown ,as well as the trans, repined control harness ,added with a couple of turbos and a ford racing map to wire everything.
It was a happy day.
It was a happy day.
Hi Keith, looking for 55 headlight bezels.Looking good. Did you ever find some headlights ?
Now that was very cool! Thanks for that
I am also very surprised how well the cut-outs sealed up…I have never run a set, betting they are not all that good.
A great ‘share’; cheers!
Greg
I am also very surprised how well the cut-outs sealed up…I have never run a set, betting they are not all that good.
A great ‘share’; cheers!
Greg
Gregg, To be honest, I took them out after listening to engine a couple of times . After a few starts they seemed to get lazy sealing shut and I could press them in another 1/16 " and was super quiet. After doing a ton of research on how to get a positive seal on butterfly type cut-outs I came to the conclusion it was next to impossible. Most people put up with it cause they like the noise, not me. (anymore lol). I still might install some guillotine type ones in the future because you gotta let those turbos breathe on a track (maybe in the future).Now that was very cool! Thanks for that
I am also very surprised how well the cut-outs sealed up…I have never run a set, betting they are not all that good.
A great ‘share’; cheers!
Greg

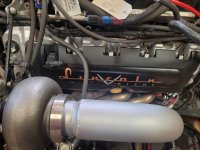
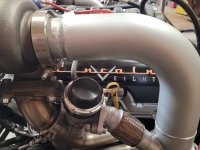
Well, I cant believe its been over a year since I started with this ,but after much sanding and bodywork done by my brother in his spare time ,and his meticulous painting of the letters, clear coating and baking of the casting, I attached the the 2 pieces together and installed them today. Although they are partially hidden in all the plumbing and such I am very happy with the result. Very few people will recognize the script from the original valve covers , but I do and that's all that matters haha. mission accomplished .Thanks Taggart , the 3d thing seems more involved and $$ than I was thinking. I'm an old school guy and basically think cheap .lol.
But, I am definitely interested in 3D printing some gear shift,signal light.and instument knobs in the future. I will make a note.View attachment 1956View attachment 1957View attachment 1958
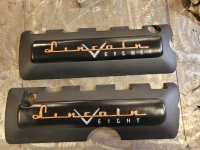
Demolded the first one today and am Very happy with the result. It looks like this might work afterall
Poured another today with twice as much black pigment and will pour another in 30 hrs with the same coloring to make a set.