
Navigation
Install the app
How to install the app on iOS
Follow along with the video below to see how to install our site as a web app on your home screen.

Note: This feature currently requires accessing the site using the built-in Safari browser.
More options
You are using an out of date browser. It may not display this or other websites correctly.
You should upgrade or use an alternative browser.
You should upgrade or use an alternative browser.
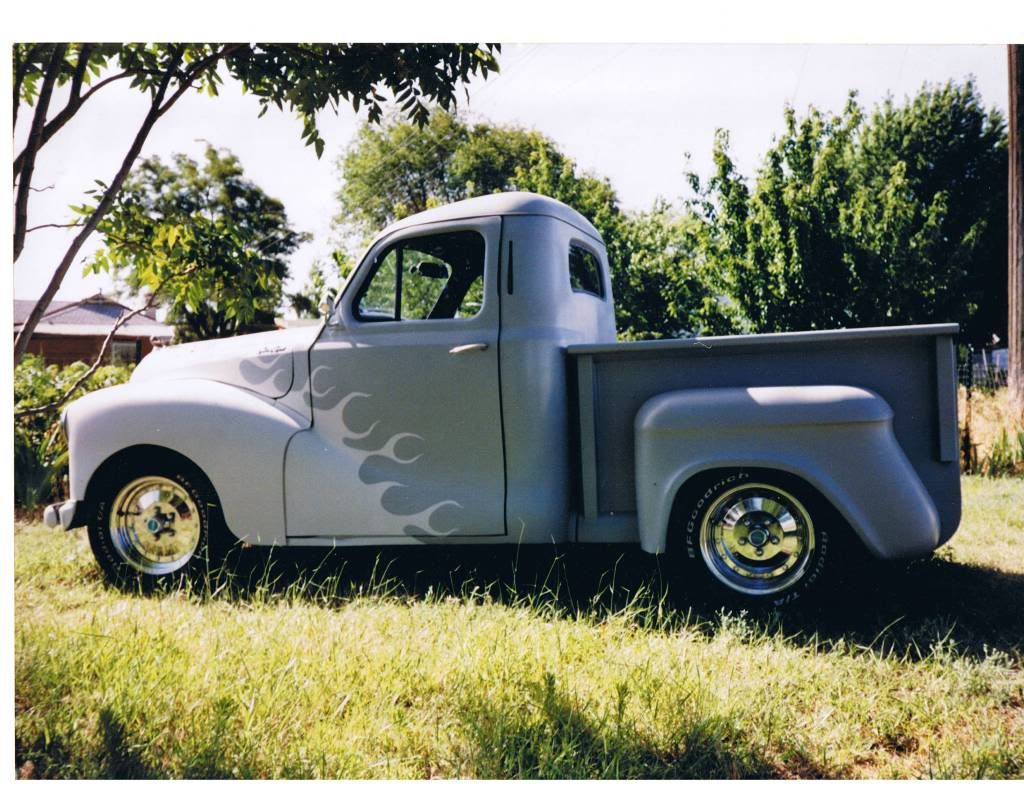
1948 Chev P/U Extended Cab Build
- Thread starter Alaska Gasser
- Start date
")
Alaska Gasser
Well-Known Member
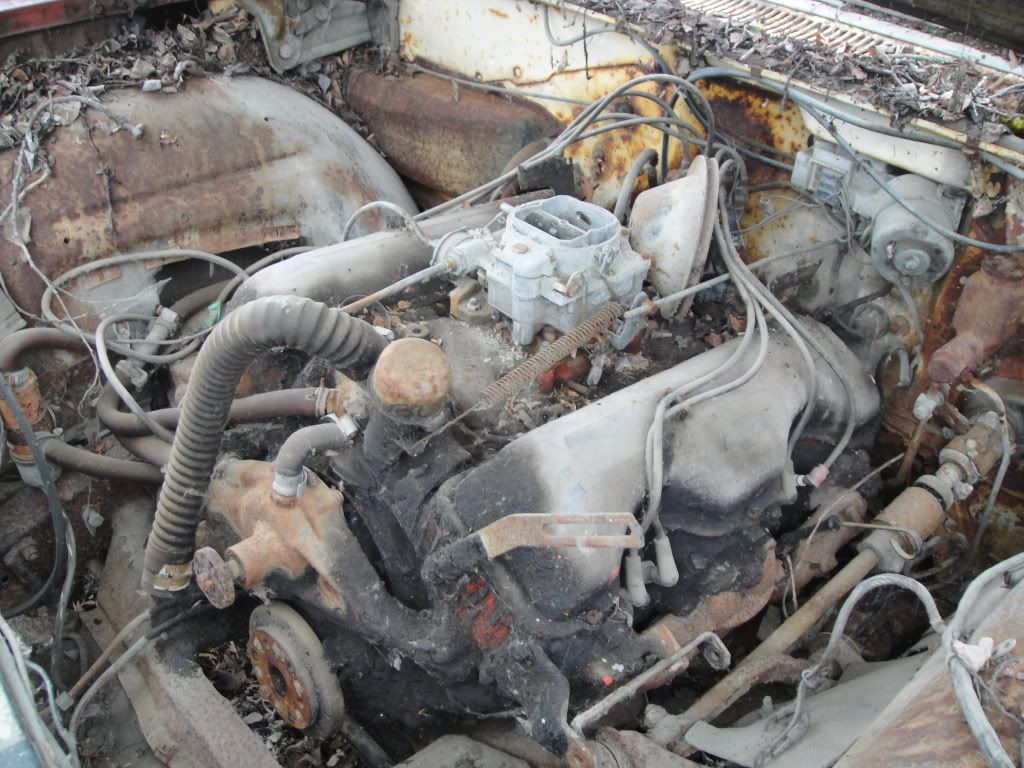
That "W" motor looks pretty sad sitting there.
It checked out nice though. The crank was right on and the holes only required 20 thousandths over. I picked up the block and am just waiting for my builder to get back in town.
bgbdlinc
Well-Known Member
When do you sleep?...You've done so much !WOW
....maybe it's the Elves...
Alaska Gasser
Well-Known Member
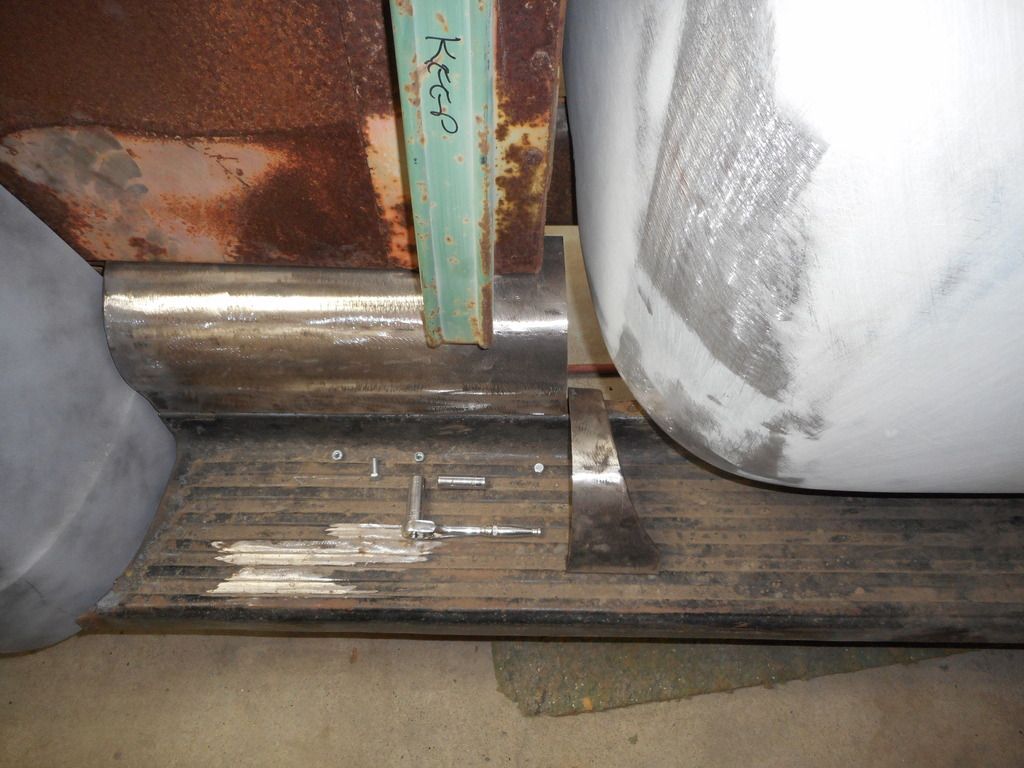
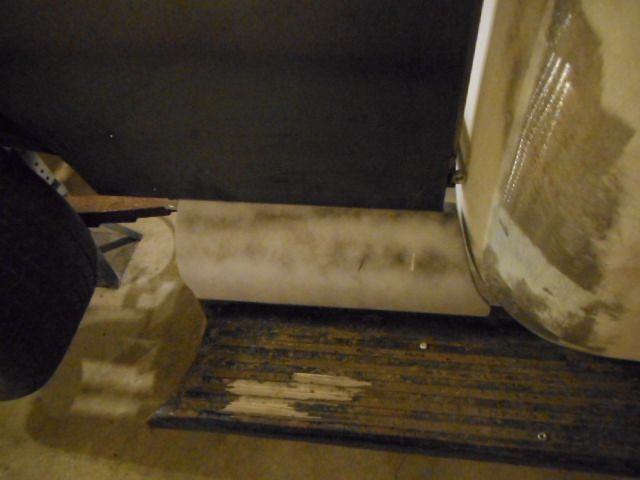
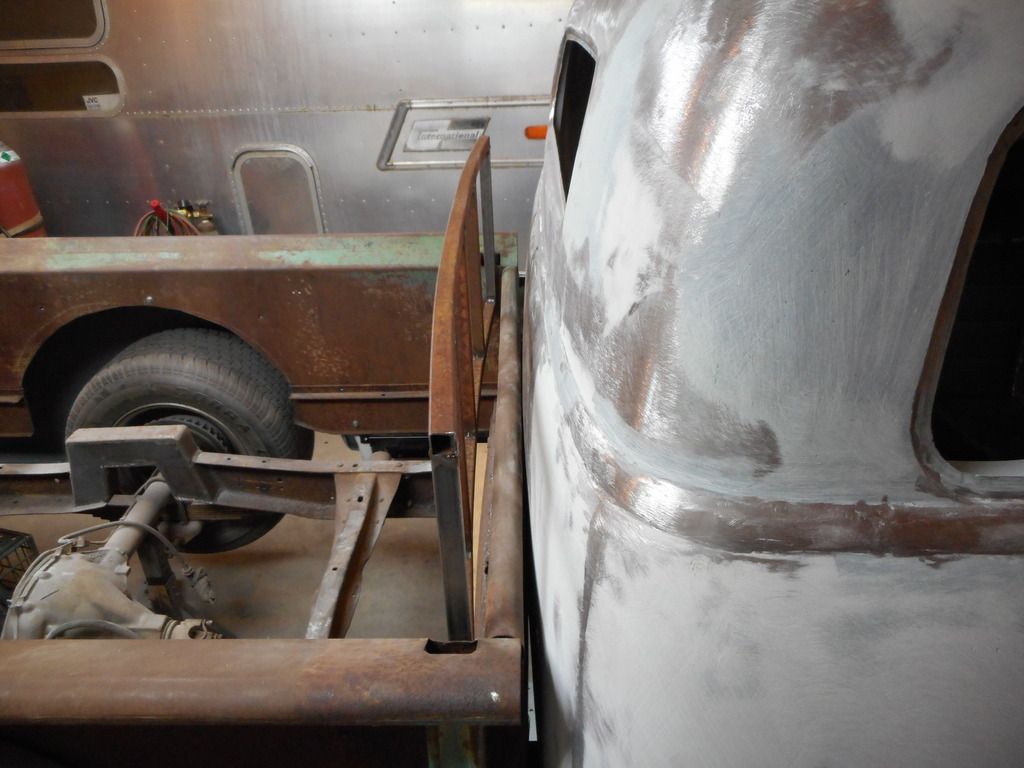
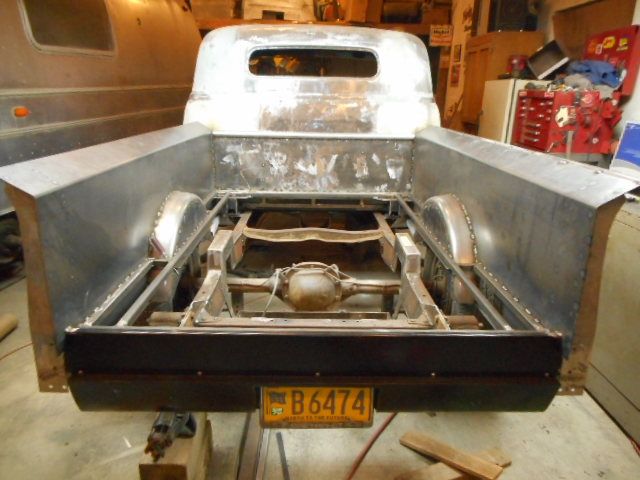
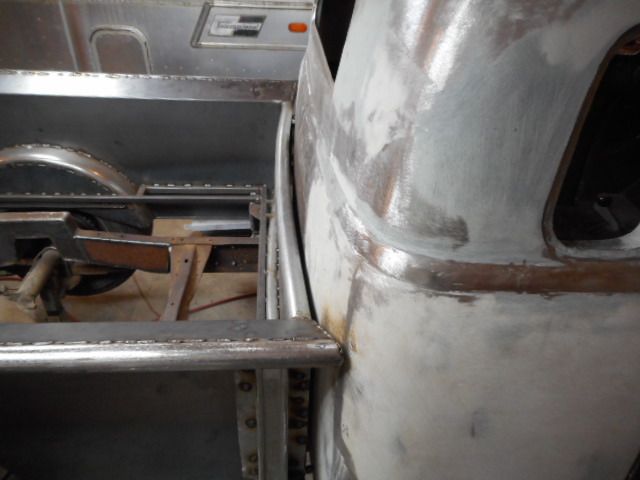
I needed to find out exactly where the bed was going to be located, so I mounted the running boards, fenders to the bed and then tried to mount the side splash aprons, but they were too long. I cut the fronts off and ended up shortening them about 3/4 of an inch.
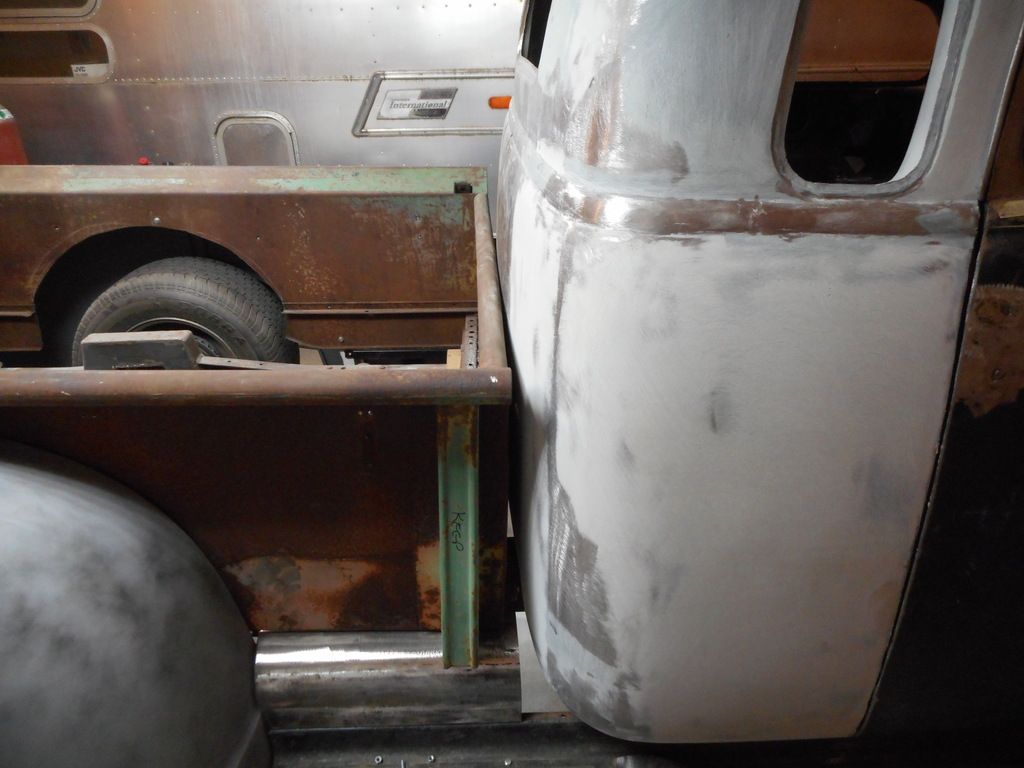
The front of the bed was hitting the cab and needed to move forward a little more. I also hate seeing a flat bed front against a rounded cab.
I made a new rounded front bed pan.
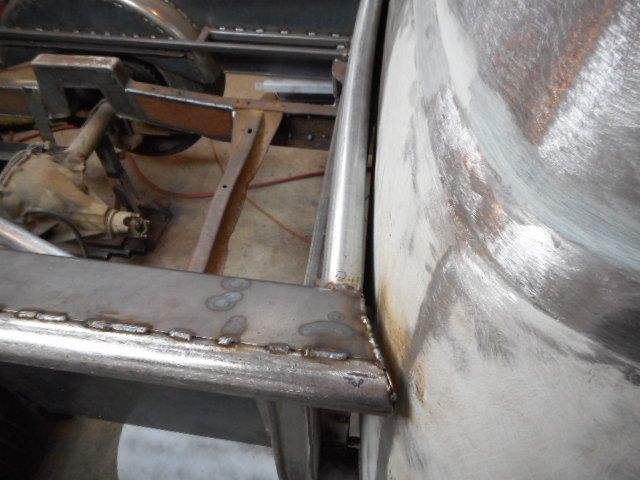
An interesting side note is that this 1 x1 square tubing is the last of what I used to make the bed frame on my '48 Austin bed back in 1988. That was my first hot rod and this is the last one I'm planning to build for myself. I saved it from the crusher and the trucks used in this build.
The bed was the right length once it moved forward and the fenders bolted up to the running boards. I made new rear mounts.
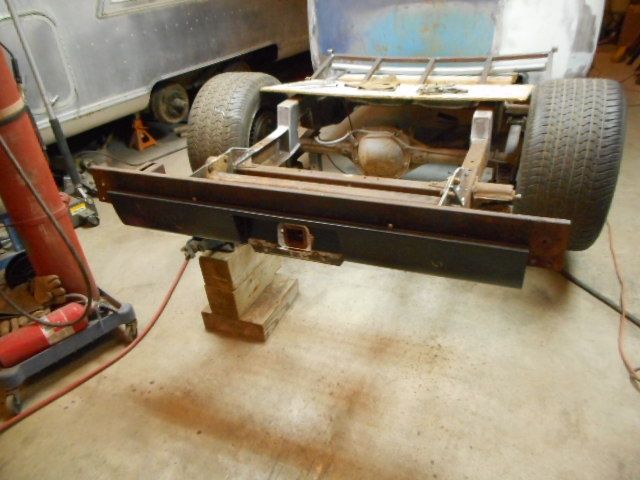
The old junk bed was removed and dismantled for parts. I used the old rear sill with the roll pan mounted to it to determine where my tow hitch would go as I wanted it hidden behind the license plate. The hitch is off a 2003 3/4 ton GMC and fit nicely.
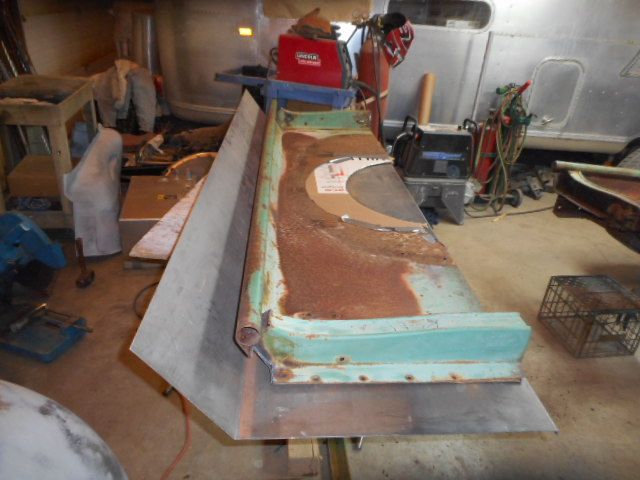
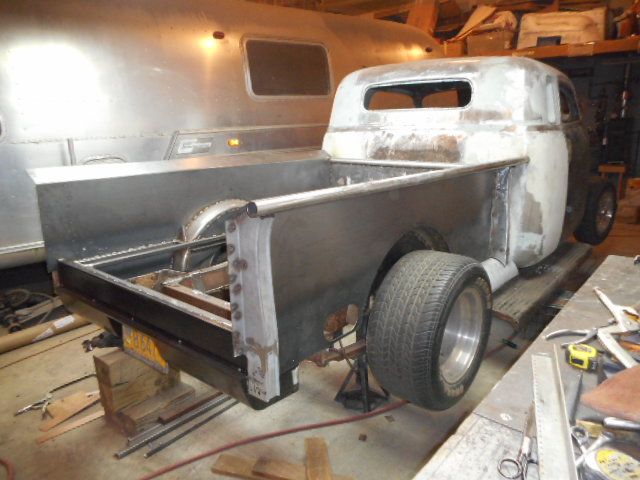
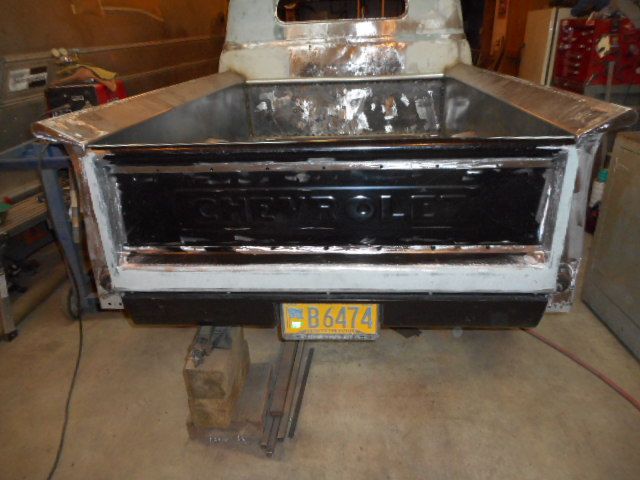
The new bedsides are 2 inches taller than stock since the originals look too short to me.
New inner wheel tubs.

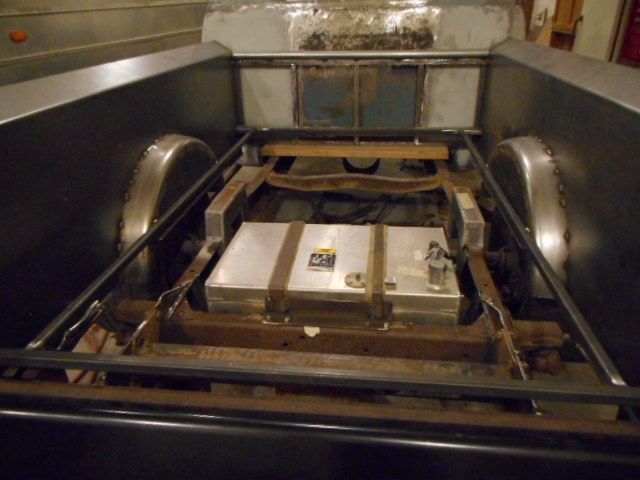
Mocked up and shows new fuel cell installed.
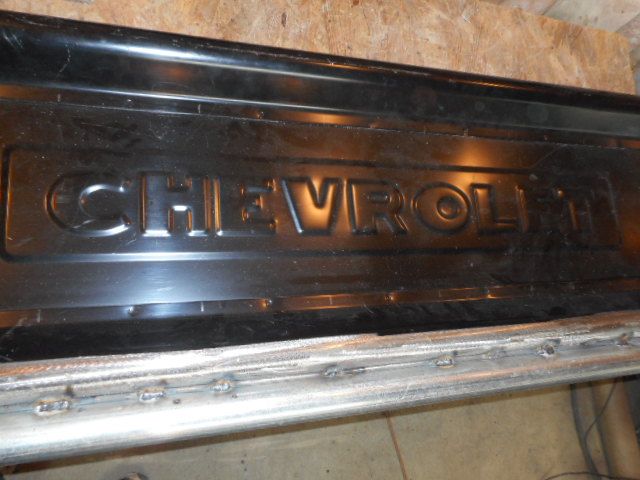
Tailgate mocked up and had old chain mounts removed. It will have hidden latches and S10 hinges.
I still need to add 2 inches to the bottom of the tailgate.
I have already stretched the stake pockets.

That's it for now.


The front of the bed was hitting the cab and needed to move forward a little more. I also hate seeing a flat bed front against a rounded cab.
I made a new rounded front bed pan.

An interesting side note is that this 1 x1 square tubing is the last of what I used to make the bed frame on my '48 Austin bed back in 1988. That was my first hot rod and this is the last one I'm planning to build for myself. I saved it from the crusher and the trucks used in this build.
The bed was the right length once it moved forward and the fenders bolted up to the running boards. I made new rear mounts.

The old junk bed was removed and dismantled for parts. I used the old rear sill with the roll pan mounted to it to determine where my tow hitch would go as I wanted it hidden behind the license plate. The hitch is off a 2003 3/4 ton GMC and fit nicely.


The new bedsides are 2 inches taller than stock since the originals look too short to me.

New inner wheel tubs.

Mocked up and shows new fuel cell installed.

Tailgate mocked up and had old chain mounts removed. It will have hidden latches and S10 hinges.

I still need to add 2 inches to the bottom of the tailgate.
I have already stretched the stake pockets.

That's it for now.
Last edited:
Alaska Gasser
Well-Known Member
I'm not a rancher, but I brought a whole bunch of horses home yesterday.


This is exactly what I saw in my head when I opened the hood and saw this.
I just wish the truck was ready to drop it in.


This is exactly what I saw in my head when I opened the hood and saw this.

I just wish the truck was ready to drop it in.
Last edited:
Nice ponies
Alaska Gasser
Well-Known Member
It's been a busy weekend.
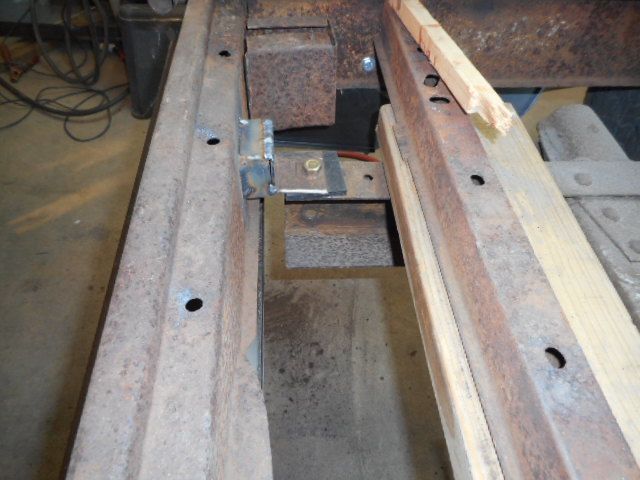
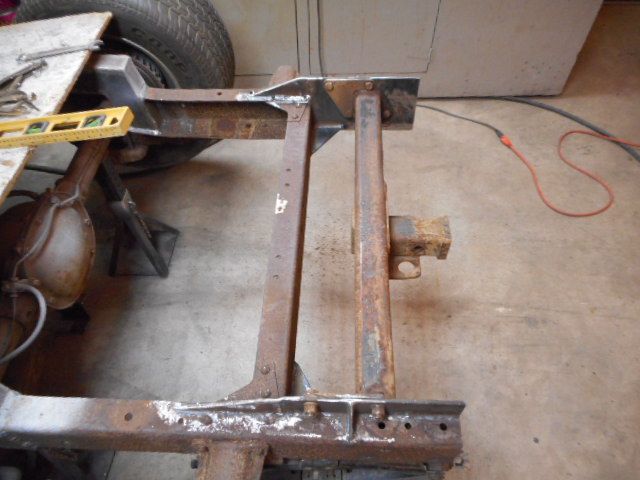
I finished boxing the back of the frame.

I got the new rear sill and installed it. I raised the floor 2 inches
I made my own mounts for the rear sill, so the factory ones were removed and used as front bed mounts.
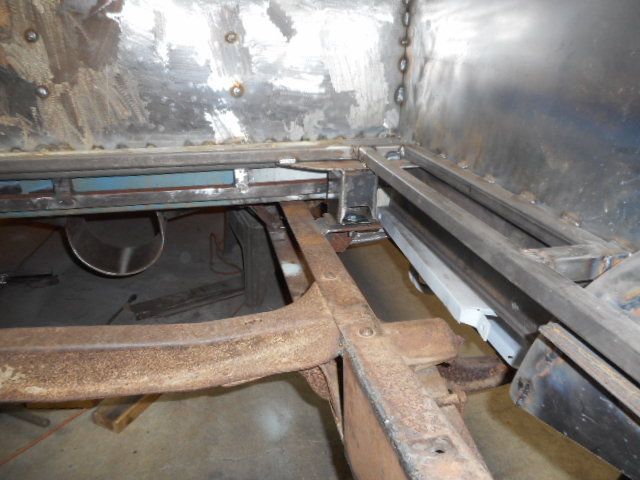
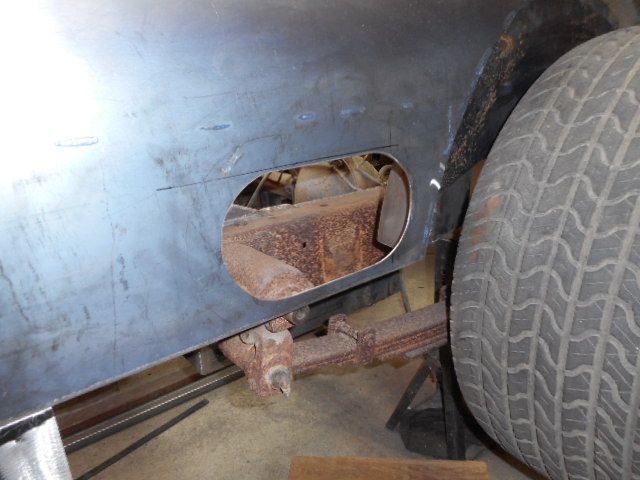
Behind the right rear tire I cut an access hole to reach the fuel connections.
I got the upper rolls welded on the bed.
There is a factory gap at the top of the stake pocket.
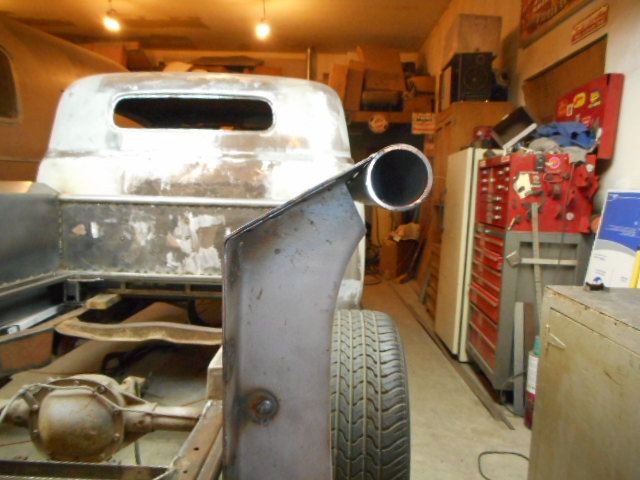

It had to go away.
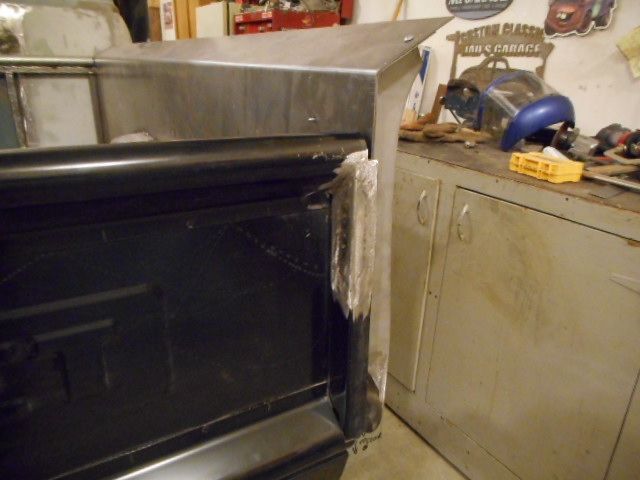
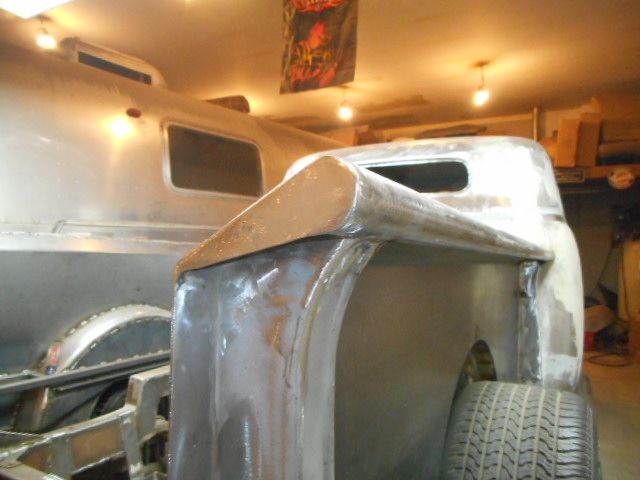
And then I added a teardrop end cap
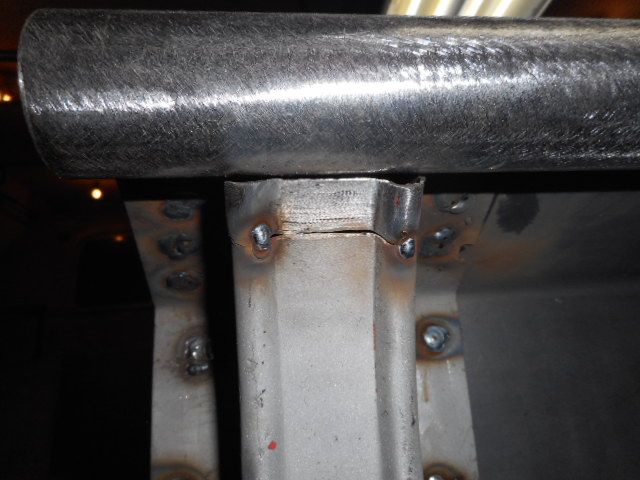
The front stake pockets are just squared off from the factory, so that had to be remedied also.
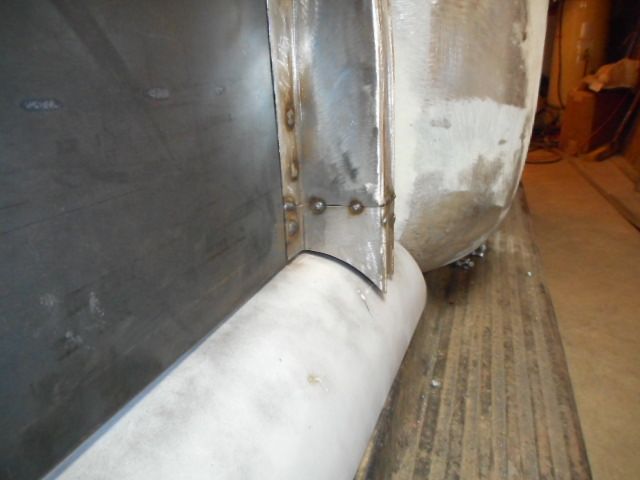
The curve at the front of the bed continued into the rolls at the edges.
Back to the shop and continue weldin and grindin.
I finished boxing the back of the frame.

I got the new rear sill and installed it. I raised the floor 2 inches

I made my own mounts for the rear sill, so the factory ones were removed and used as front bed mounts.

Behind the right rear tire I cut an access hole to reach the fuel connections.

I got the upper rolls welded on the bed.

There is a factory gap at the top of the stake pocket.


It had to go away.

And then I added a teardrop end cap

The front stake pockets are just squared off from the factory, so that had to be remedied also.

The curve at the front of the bed continued into the rolls at the edges.


Back to the shop and continue weldin and grindin.
Mighty fine work, thanks for the great update...even if does make me feel like the slacker I am! 
Very excellent work indeed.
Alaska Gasser
Well-Known Member
Keith- We are just waiting for the house to sell. Jackie is still thinkin about making a trip next month.
Alaska Gasser
Well-Known Member
It has been a productive couple weeks.
To make the tailgate 2 inches taller, I found a tube the same diameter as the old bottom round and added a 1/4 inch rod in between.
I then added sheet metal to both sides to box it in.

I added hidden latches.
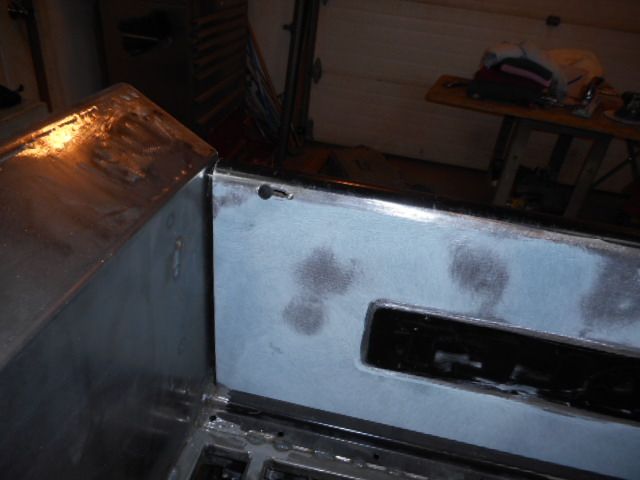
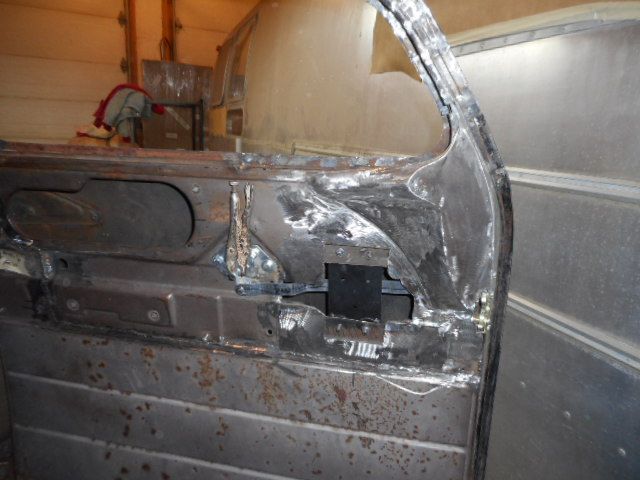
Created the top of the Drivers window / door.
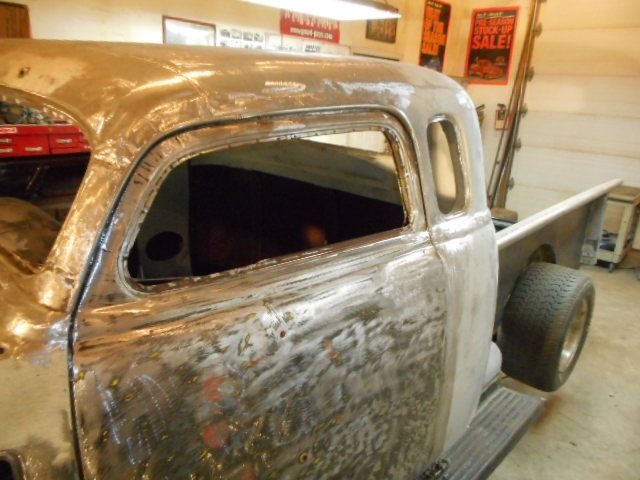
Cut off the end of the drivers side dash and welded it to the door.
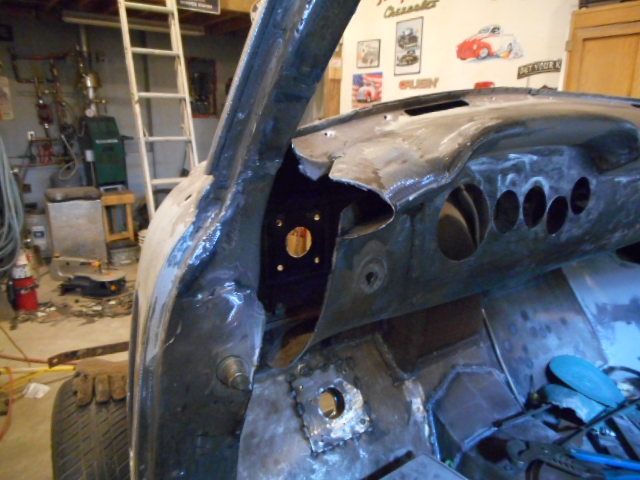
Got it molded in and finished up.
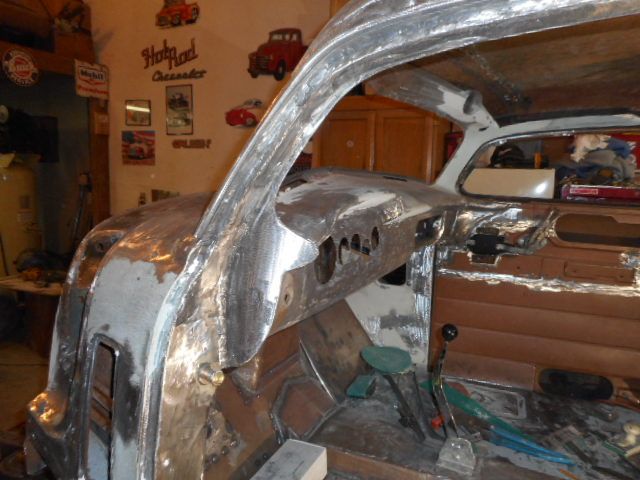
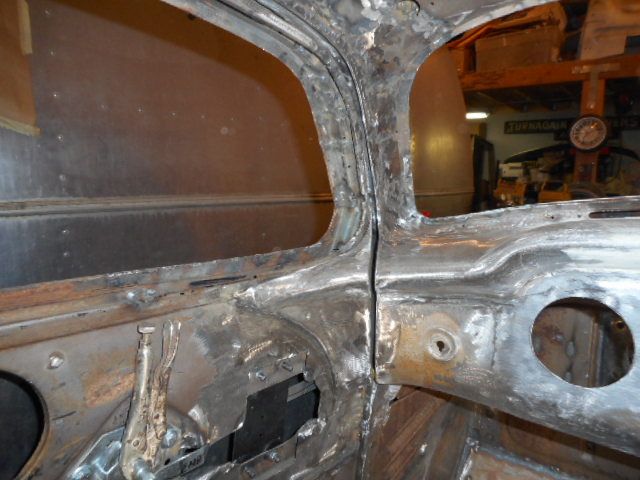
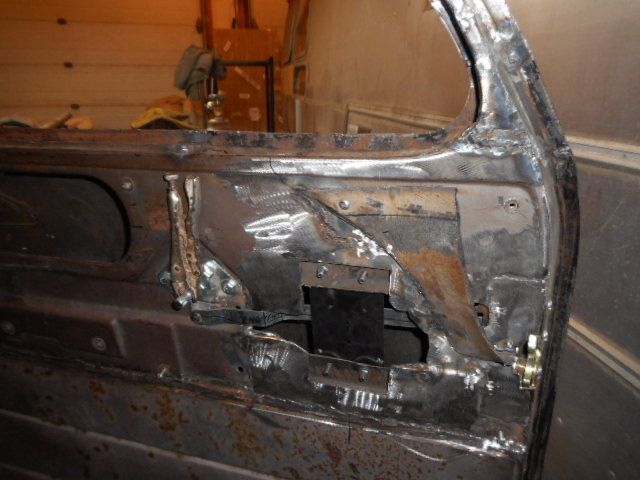
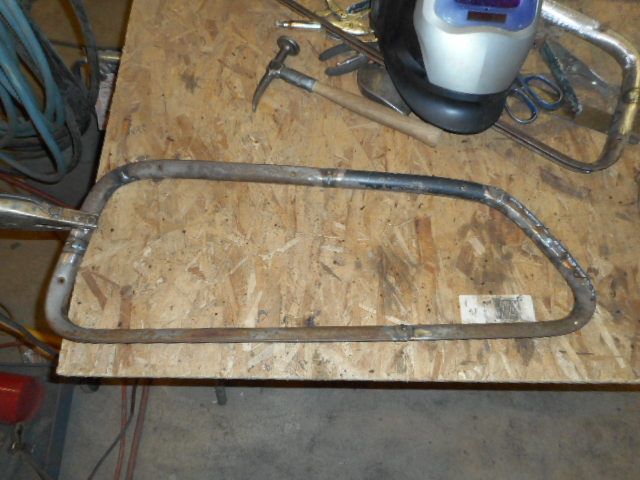
Got the drivers inner window frame made.
Now I'm in the process of finishing the bodywork and primer on the tailgate and both inner door window frames. This was the last major fabrication left on the project. Now it's time to start finishing......oh everything.
To make the tailgate 2 inches taller, I found a tube the same diameter as the old bottom round and added a 1/4 inch rod in between.

I then added sheet metal to both sides to box it in.


I added hidden latches.

Created the top of the Drivers window / door.

Cut off the end of the drivers side dash and welded it to the door.


Got it molded in and finished up.


Got the drivers inner window frame made.

Now I'm in the process of finishing the bodywork and primer on the tailgate and both inner door window frames. This was the last major fabrication left on the project. Now it's time to start finishing......oh everything.
Ah progress, good stuff.