Computer
Text
and photos by Bob Klowak
| Just a little note: We had a big delay between postings for many reasons. My younger sister was diagnosed with cancer and passed away. She never got to ride in the '34 either. This took up a big part of my time. I also took on some projects which took up more of my time, all which I enjoyed to build. Now it's time to get back on track and get this puppy going |
 |
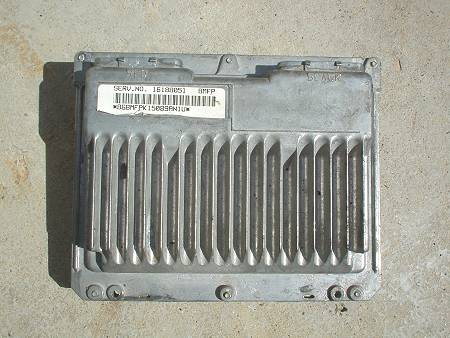 |
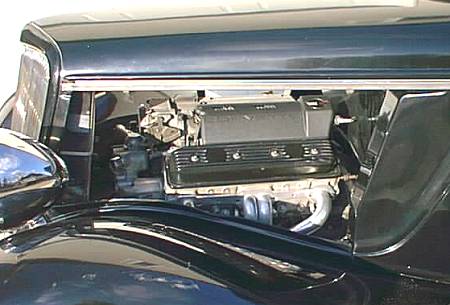
| The heart of this engine is its computer. The engine is a 1996 LT-1 which uses a computer that is OBD II or On Board Diagnostic Generation 2. Now the software that I purchased will program OBDI at a reasonable price and so with the hardware except for the laptop. So what I did was get a 1994-95 computer Gen I and used the original harness. The part# of the computer is 16188051 |
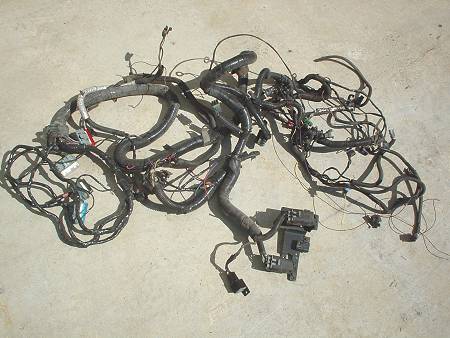 |
| I took the original harness and with the aid of the schematics of the computer I stripped away all the wires I didn't need and kept those we needed. I streamlined the harness and fitted it to the engine and adjusted the wires to fit. I temporarily tied the wires to keep them neat. |
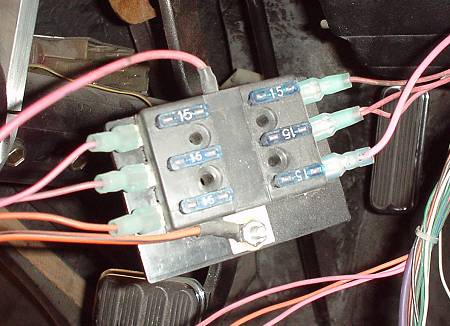 |
| I then added a sub fuse panel which powered the computer and components. Two of them were for memory and the other four were for things like oxygen sensors, injector's fuel pump and the run for the computer. It was necessary to open the fuse block and separate the main strip into two sections. The last step was to remove the OBDII test plug and install the OBDI or the ALDL plug so we could re program the computer. Once this was done the relay for the fuel pump was installed, and fuel put in the tank, it's a go. |
 |
Here we are ready to go .Click HERE to watch the startup: |
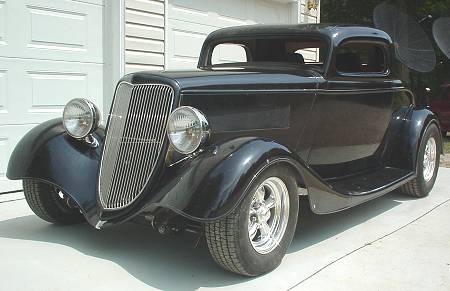 |
| Now that the car is running and all the big parts are on, it's time to completely dismantle the car right down to the frame. It would have been great to take it for a blast but I didn't put any brake fluid in .The reason it's messy when you disconnect everything. |