|
|
|
|
Exhaust
|
|
Text
and photos by Bob Klowak
|
|
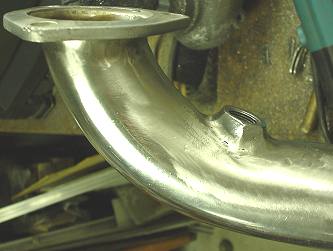
The
gas tank is hooked up and the fuel lines are in. The next step is the
exhaust. We have chosen pre-bent 304 stainless steel pieces from MBRP
Inc. in Huntsville, ON. We have a 90 degree piece and marked it out both
top and bottom. It was fitted in its location and when we were happy cut
the pipe and flared it on the inside to fit the lip. We then proceeded
to weld it with stainless wire in the mig welder.
|
|
|
|
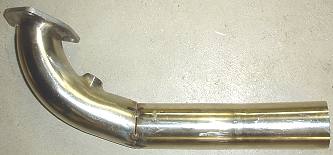
After the welding, we ground down the weld smooth. Since we are using
a fuel injected motor, the use of oxygen sensors are necessary and "bungs"
or nuts must be welded to the pipe. After this was done they also were
ground smooth. This piece was bolted to the headers and the next step
was planned out.
|
|
The
next piece was chosen and the location keeping in mind all of the factors
like: oil filter location, easy removal, closeness to the starter, etc.
Tack it in place and move on to the next bend and its location. Plan your
attack from front to back. Don't weld until everything is in place.
|
|
|
|
As
you can see by the seven welded locations, there is a lot of work. This
exhaust is going through the frame supports. |
|
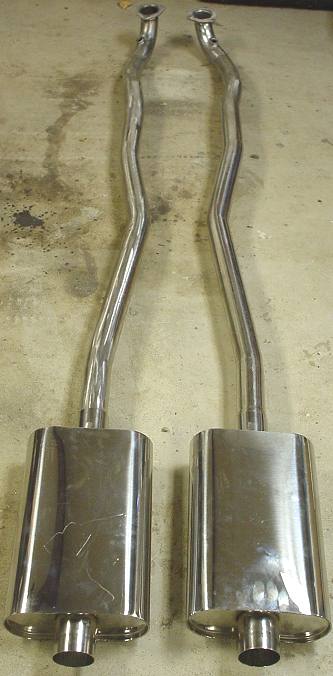
304 stainless is very shiny when polished. You can probably see me taking
the pic of the muffler in the reflection. Its great stuff and will be
virtually maintenance free except for dusting (ya sure except when you
go through a mud puddle.)
|
|
|
|
As you can see, both pipes do their thing twisting and turning and making
there way to these great looking mufflers from MBRP. These pipes took me
4 days to make up and fit and polish. Buying the parts and making them up
yourselves can save you a ton of money. This job alone paid for the mig
welder. |
| Now
we proceeded with the tailpieces. Five bends were needed and with care full
planning and fitting we were able to get it to fit properly and with proper
clearances to the rear gas tank. After all was fitted and all clearances
were met all the pipes were pulled off and welded. This is where the fun
begins. All these joints had to be ground smooth and then we started with
60 grit disks and work our way up to 320 grit. Once the sanding was done
off to the dirty job of polishing. This is really dirty so don't be afraid
to get down. The pipes were a bit loose in the mufflers so we went off to
Carline Muffler in Alliston, ON and Ed carefully expanded the pipe until
it was snug. During final assembly, the pipes will be tacked to the mufflers
and ground and sanded and polished on the car. This will be a real challenge.
Now you say: "what if you have to remove the exhaus?t" What for?
This pipe and muffler will last forever. |
|
|
|
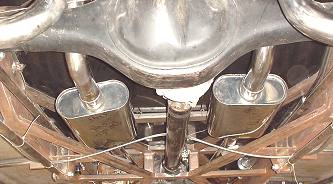
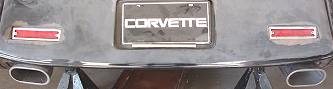
It
was pretty hard to get a good pix of the exhaust on the car, so here it
is. The only part I didn't like was the drive shaft was not in the center
of the mufflers, but that's what you get when you use a Ford 9" rear
end. The pumpkin as they call it is off center. Oh well! |
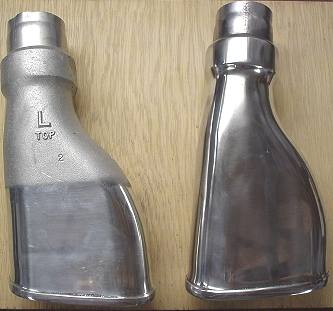
| I
have no idea what these tips were off of or who made them but I loved the
look. Maybe someone can e-mail me if they know. They have that old Chevelle
look. These were cast aluminum and just the last half of them were polished,
so I went crazy and sanded all the cast marks and rough surfaces and polished
them. They look great, at least to me. |
|
|
|
So
here they are out the back. I wonder what they will sound like? The next
thing we will have to do is make the wiring harness for the motor. I've
got to hear this puppy growl. |
|
|
|
|
|
|