|
|
|
|
AC Bracket and Rad Shroud
|
|
Text
and photos by Bob Klowak
|
|
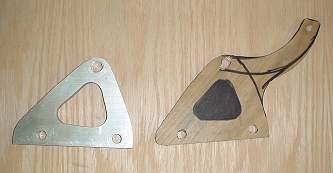
Well
you guessed it. More aluminum. The short bracket that was removed from
the alternator will be used on the AC side since the holes on the heads
are the same and ACcompressor is roughly the same diameter size. All we
had to do was make another bracket with an arm on it to match the GM compressor.
Again we made a template out of plywood.
|
|
|
|
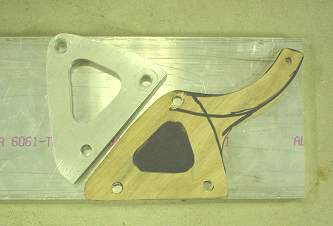
This template was then transferred onto a plate of 6061 aluminum but it
is only 3/8" thick. The reason for this is to achieve clearance for
the belt. If I had access to a milling machine, milling a recess in a
½" plate would have kept the two pieces looking the same.
All we have is a band saw and a few hand tools.
|
|
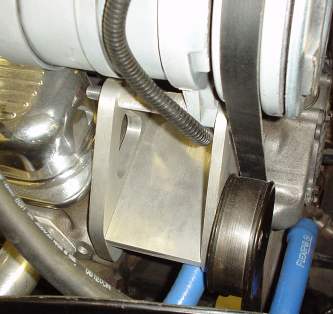
After
everthing was cut out and sanded on the belt sander, I found an idler
from the original brackets that was on the motor. I felt the distance
from the crankshaft to the AC compressor was a little long and the belt
could vibrate and possibly hit the bracket. The idler fit perfectly on
the bracket using a long bolt through the bracket into the head. Note
the blue silicone hoses for the heater. They should last forever.
|
|
|
|
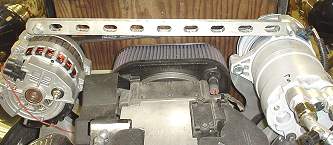
We
had a long piece of aluminum left over so it was cut and fixed from alternator
and AC compressor. We installed a tensioner so this can be a fixed arm.
|
|
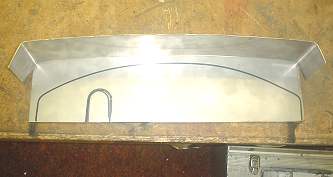
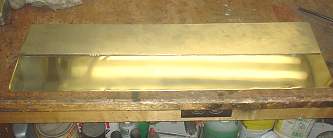
After looking at the previous pix we realized that the top of the Walker
rad was dull looking. A donation was made to us of some sheets of 304
stainless. The top cap was bent in the vise using a 1x1 tube as a form.
The face was traced off the rad.
|
|
|
|
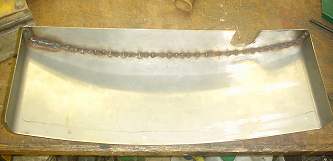
The fellow that donated the metal is a welder and advised me to keep the
metal cool, so I kept a wet rag under the metal while tacking it underneath
.So far so good. I used stainless wire in the mig and used gas welding.
|
| A
trial fit looked good and fit fine. I continued to weld the top side allowing
it to cool. Then, with my 4" grinder, I carefully ground the weld smooth.
Then I switched to sanding disks using #80 then #120 and then #180. I have
a variac which can vary the voltage to my grinder, so I can slow down the
speed of the grinder. This worked well, but you have to be careful. |
|
|
|
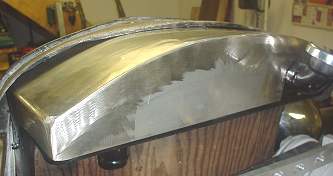
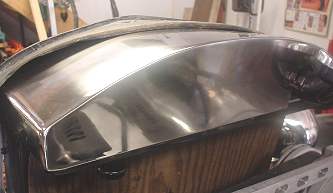
After
I was happy with the grinding and sanding, I made a makeshift polisher with
a 1/4hp motor and arbor. I picked up the right stick of polish material
and it did the job. A mirror finish was brought up and it made the top of
the rad look good. |
| As
a result, the side of the rad stood out black so a couple of strips were
cut out and will be attached when I pull out the rad. This was my first
attempt to weld stainless and it turned out well. It goes to show you anything
can be done with patience. |
|
|
|
|
|
|
Copyright
© 2001-2003
canadianrodder.com/eFX Design
|