|
Bob Fabricates Hood Braces
|
|
|
Text
and photos by Bob Klowak
|
|
|
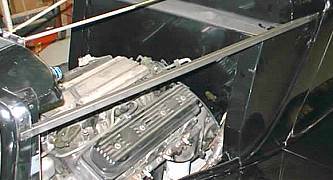
The side brace started as a ¾" x ¾" tube. The ends are cut and shaped to fit the surfaces. The rear has a ¼" -20 nut welded and fastened from inside the cab. The front has a ¼" -20 bolt welded and fastened to the rad shell. |
 |
 |
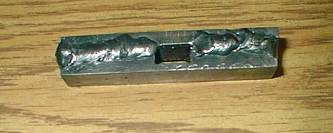
This latch assembly started from a 3/8" x 5/8 x 3" piece and a ¼"x 5/8 x3" piece. Several cuts were made the width of the finger latch. The cut pieces were removed and hand filed for a tight fit. |
|
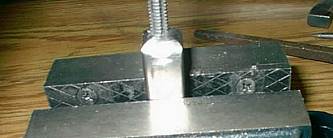
The two pieces are then clamped together and welded. They are then ground and polished on the belt sander to fit inside the ¾" tube, The fit is very loose. This was an easier way of making a rectangular hole. |
 |
 |
The finger latch piece is then installed after a set screw is placed on the side . This is in place for height adjustment and to hold the finger. |
|
Holes were drilled at both ends and tapped at ¼-20. Rods were used to join the two together and are adjustable. A rod was used on the back latch running into the cab. That end has a 1" ball threaded onto the shaft. The other end has a spring fastened to the front bolt, keeping tension on the latch. |
 |
 |
Two slits were made in the ¾"tube and the assembly installed. Later the tube and fingers will be powder coated . Two small holes were drilled in the side of the tube to access the two set screws. |
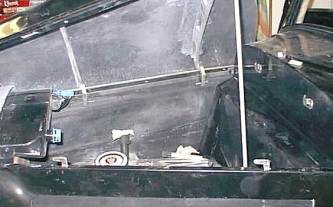
| The side panels were installed with 3 stainless machine screws and slots to match. The hood was then closed and marked for matching slots that go through the hood and brace rails. Then the finger latches were adjusted for a snug fit. |
 |
|
|
|
|
Copyright
© 2001-2002
canadianrodder.com/eFX Design
|
|