|
Bob Fabricates Hood Braces
|
|
|
Text
and photos by Bob Klowak
|
|
|
First I made a Template of the underside of the hood in the spot it will sit. You must calculate that it will be sitting on two rails that are mounted to the hood lip. |
 |
|
|
|
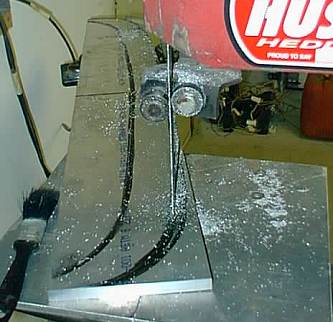 |
The Template was then traced onto a ½" plate of 6061 aluminum. This takes a while to cut out. I used 2 bungy cords to help apply pressure to the plate aluminum. Boy, it's tough going with out them |
|
The one cut across the top took 20 minutes, lots of patience required here. |
 |
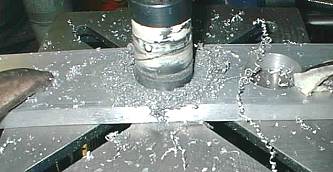 |
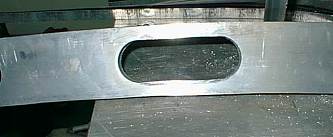
After cutting it all out, I carefully measured out and scribed each hole . Use cutting oil and go as slow as you can . This way the cutter lasts longer. Note the clamps on either side of the material . You wouldn't want it to fly away on you |
|
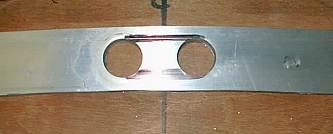
After making the two holes, I scribed out the joining lines. The lines were then cut with a jig saw. Go slow and steady. I also taped the bottom of the jigsaw to help it to slide easy, and also to help to prevent marking of the material. |
 |
 |
As you can see, there is a lot of drilling, cutting and sanding. |
| Once all cut out, I used a drum sander in my drill press to sand out the rough cut lines. Also, tape the back side of the aluminum to help it to slide and again to help prevent scratches. |
 |
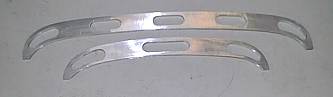 |
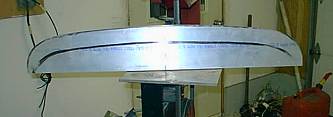
Using my belt sander and drum sander, I got nice results. Aluminum is fairly easy to work with and polishes well. |
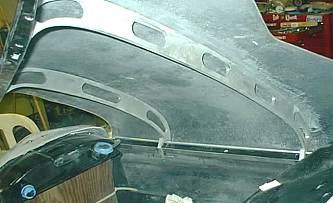
| After fitting and sanding the top side of the braces, holes were drilled in the bottom of the supports and tapped. The bottom rails were then secured by countersunk machine screws. The hood then was fastened to the rails with countersunk machine screws. After the hood is painted I will use a strip of thin foam between the braces and hood to help reduce rattling and such. |
 |
|
|
|
|
Copyright
© 2001-2002
canadianrodder.com/eFX Design
|
|