|
Some Dash Work
|
|
|
Text
and photos by Bob Klowak
|
|
|
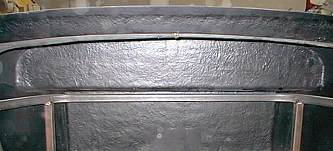
This Pic is of a clean dash. Note the 1x1 tube frame. |
 |
 |
The dash has a lip on it so a lip slot must be added to make it removable . Both surfaces were roughed up and fiber glass resin was brushed on. A series of screws were used to hold it in place . Spacers must be used to keep the slot even while it set. |
|
After it sets up trimming and fitting of the dash is necessary. Its now beginning to take shape. |
 |
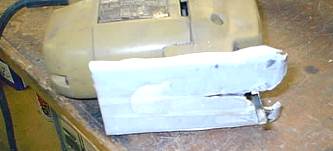 |
Because of the odd sizes to cut the holes in the panel, a jig saw will be necessary to cut the holes. To prevent any heavy scratches in the panel we covered the bottom of the saw with masking tape. |
|
I found using chalk to draw on the face of the dash made it convenient to rub out and shift around while in the car to get the desired look and location. |
 |
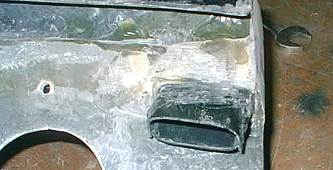 |
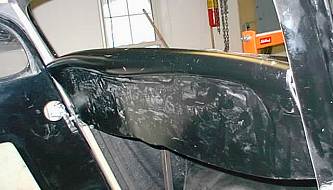
Installing defrosters in a 34 ford has always been difficult. The vents that came with vintage air were used by cutting everything off but the inlet. It was then glassed over to the end of the dash and the end was capped . There is a natural cavity in the top of the dash and the trick is to seal it off. |
| This is the right hand of the dash fitted and capped. |
 |
 |
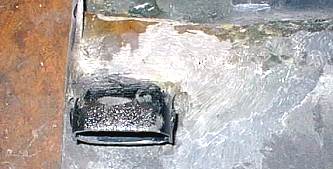
To seal along the bottom edge of the cavity, a 1"x1/2" self adhesive foam was used. |
|
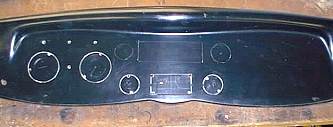
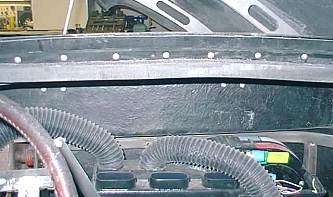
After care full measurements and scribing , holes were cut with the jig saw. Signal lights and headlight switch were drilled. Note the natural bulge in the top of the dash. It was perfect for the defrosters. Three slits were cut in the top of the dash and the vintage air was fitted via the hoses and tested . The air flow was very good . The radio will be installed just above the heater/air controls. |
 |
|
|
|
|
Copyright
© 2001-2002
canadianrodder.com/eFX Design
|
|