Deuce-Merchant
Well-Known Member
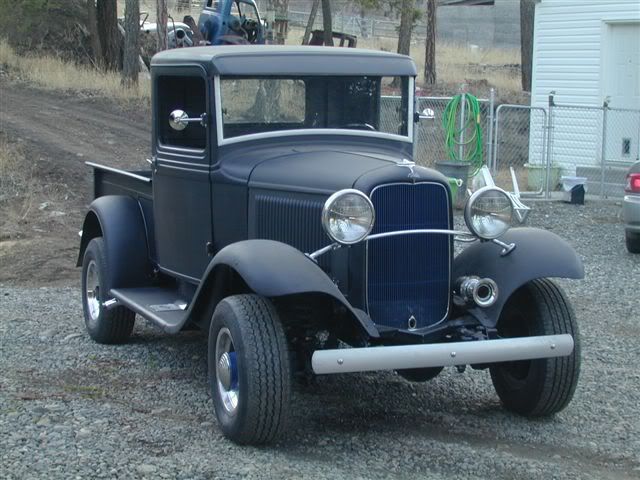
We got Dads 32 on the road and I put about 200kms on it.
We have 4:11 gears in it, so it is kinda slow for sure.
Also the transmission had a bad bearing noise in it and it was getting worse, thats what you get by buying other peoples junk.
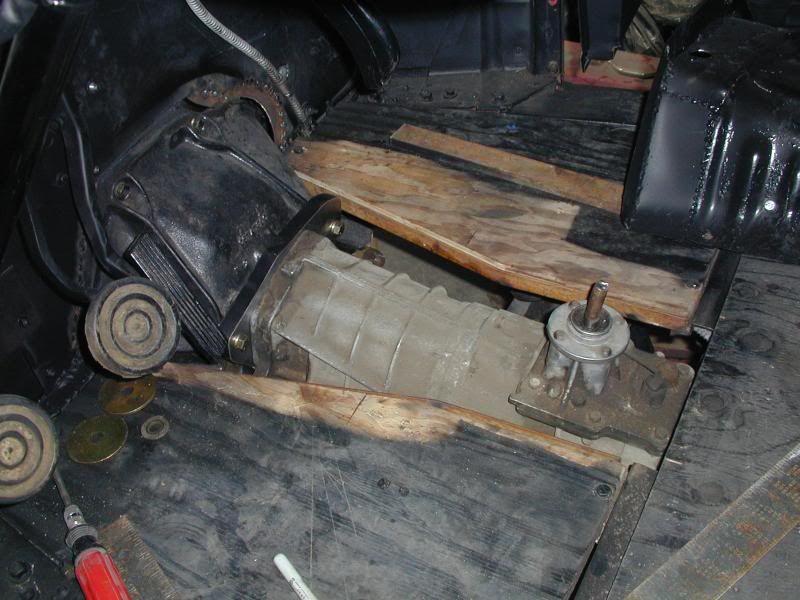
My friend at work donated a 88 Ford Ranger 5spd overdrive tranny, and this is how I killed two birds with one tranny.
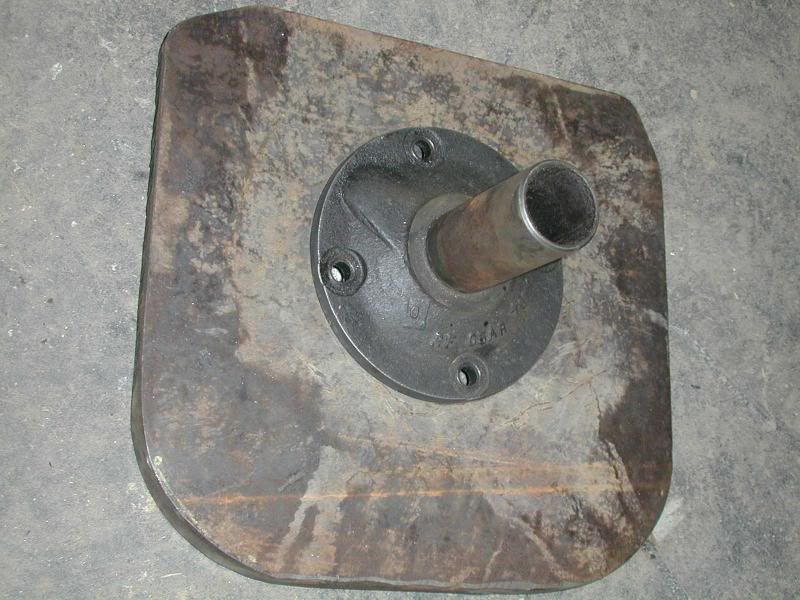
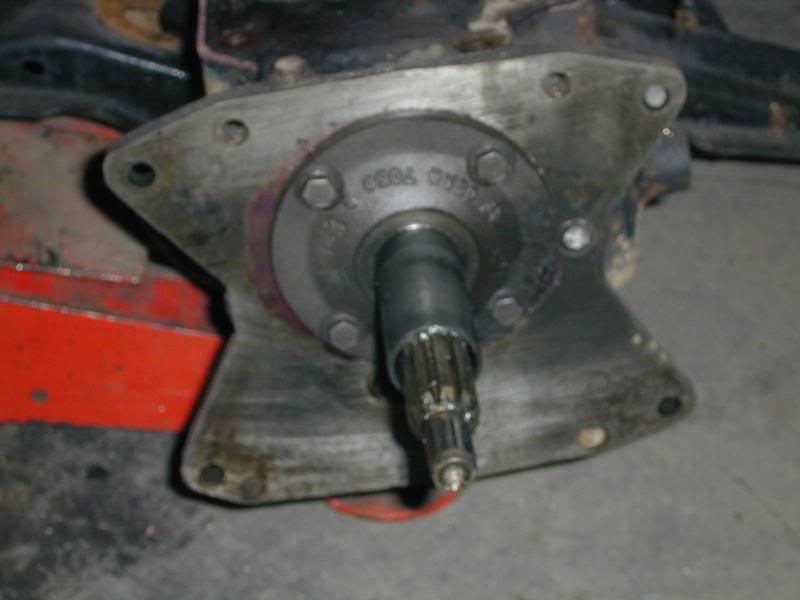
Here it is when I got it
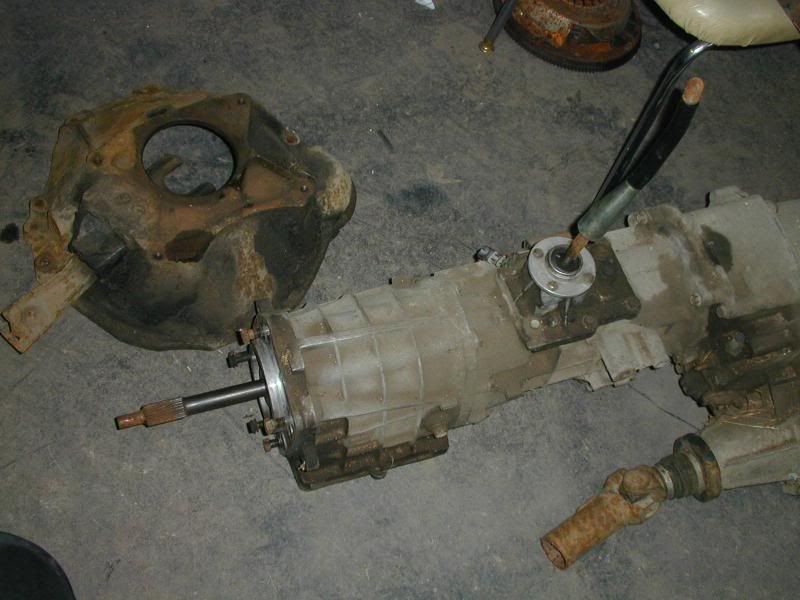
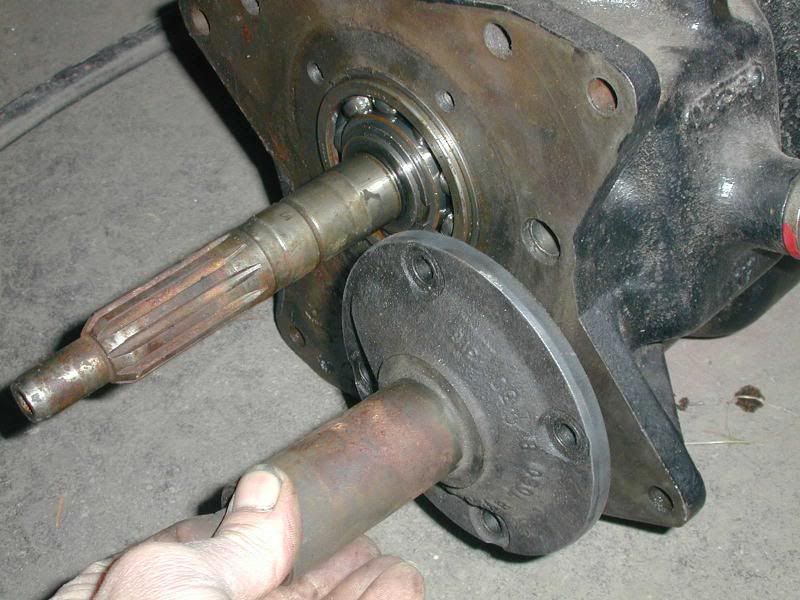
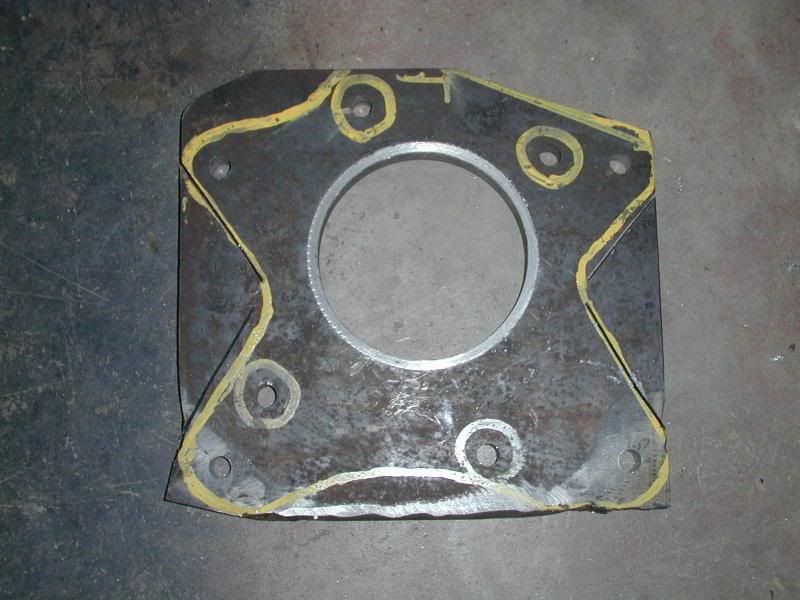
I had another toploader sitting here, so I could measure from it without having to take the truck apart just yet.
With all the measuring done, the input shaft of the Ranger tranny is 3/4" longer than the toploader.
I searched in the junk and was lucky enough to find a piece of plate, just the right size.
I have another friend that is a Machinist, so he gave me some tips.I put a large piece of pipe in the Lathe and faced it to make it true.
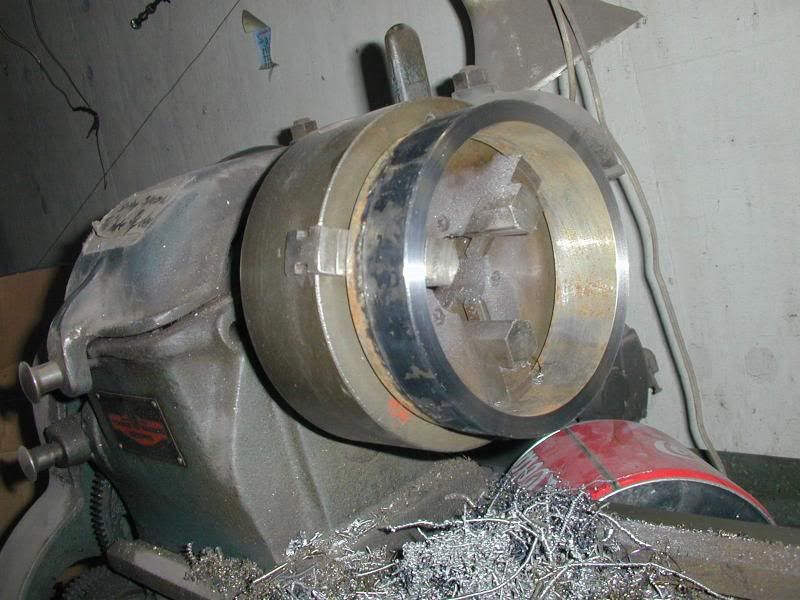
I drilled a small hole in the plate where I found the center of the hole needed to be.
I then ran up the live center and pushed the plate against the pipe.
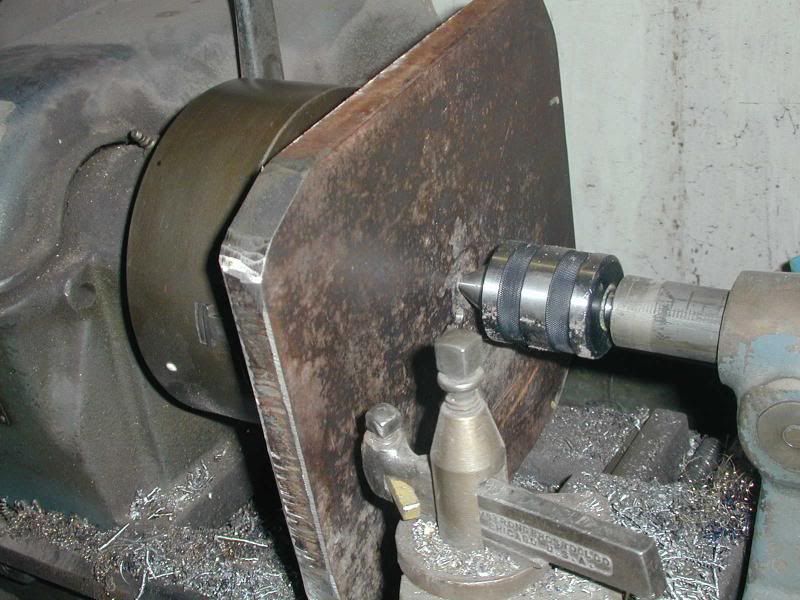
Then welded the plate to the pipe
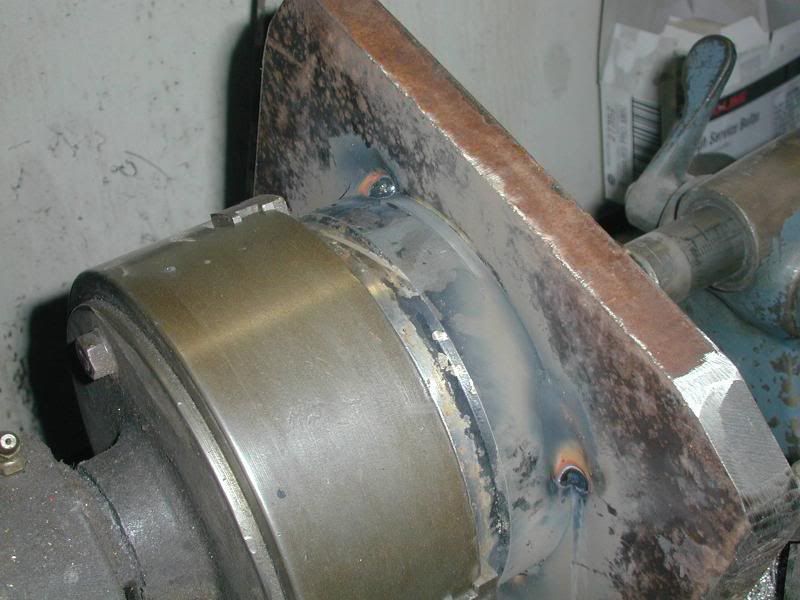
Then I turned the center hole out to be a couple thou larger than the snout on the front of the tranny.

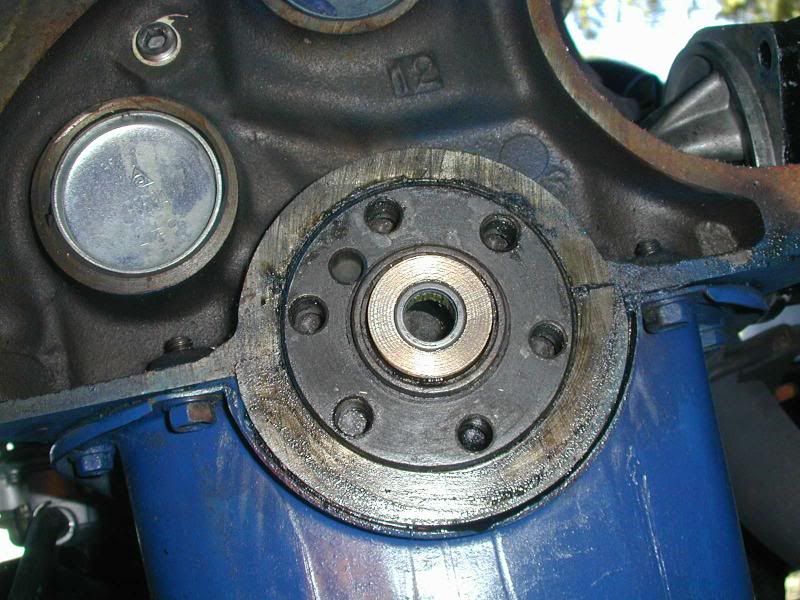
I removed the front bearing retainer off the old Toploader and machined a groove in the plate for it to fit.
This will align the bell housing perfectly with the tanny as the bell housing fits tight over this retainer
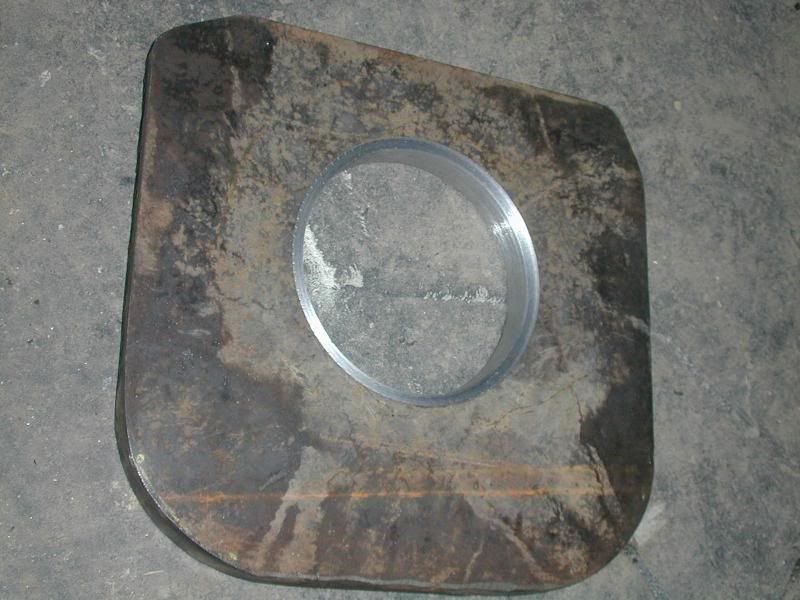
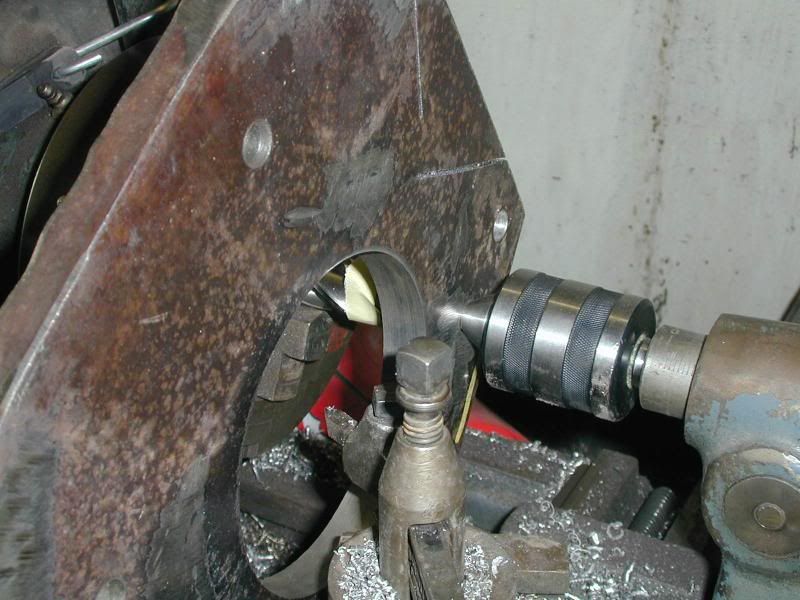
The heads of the bolts have to be countersunk below the surface of the plate for clearance, so off to KMS to buy a 1" endmill.
Used the live center on the lathe again to center it and piece of cake

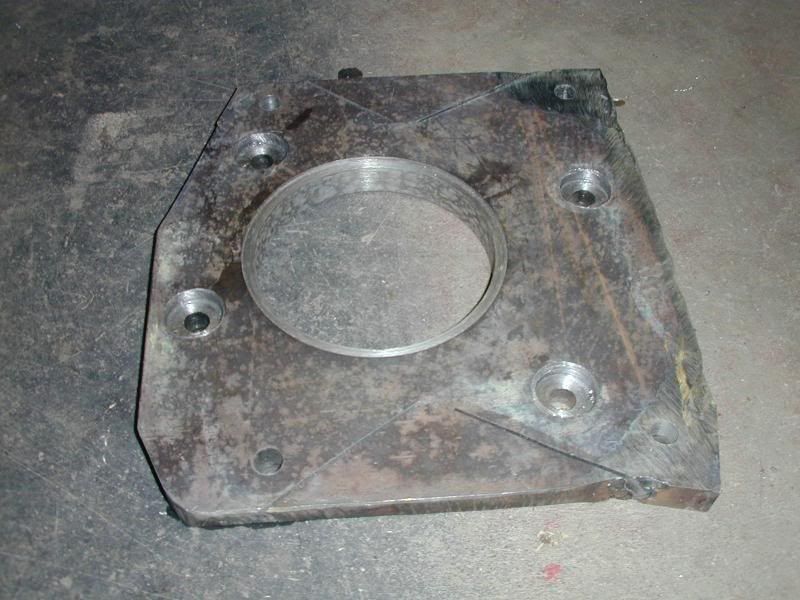
Torched off the extra metal and ground it up.
I did need to turn down both the front and back surfaces to be sure they were perfectly parallel with each other.
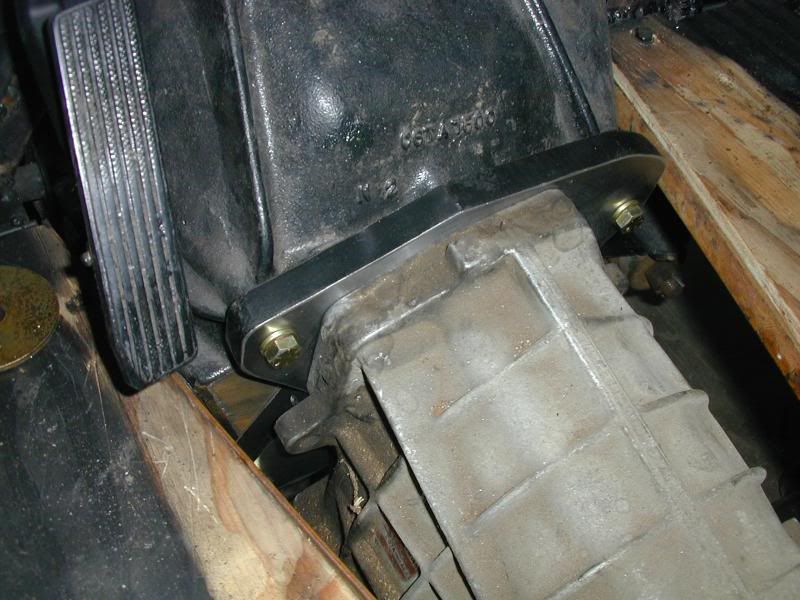
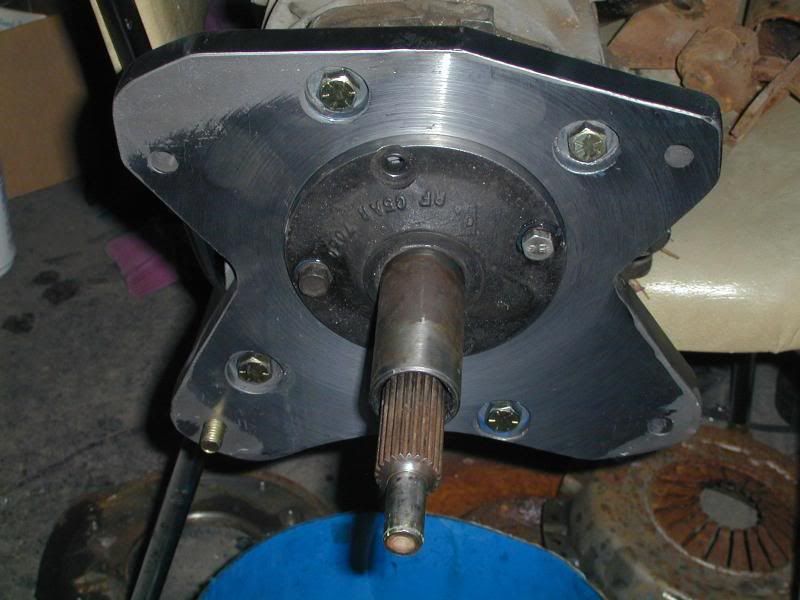
Here is a pair of pics with the original and the new tranny with the adapter installed so you can see how they look compared to one another.
We have 4:11 gears in it, so it is kinda slow for sure.
Also the transmission had a bad bearing noise in it and it was getting worse, thats what you get by buying other peoples junk.
My friend at work donated a 88 Ford Ranger 5spd overdrive tranny, and this is how I killed two birds with one tranny.
Here it is when I got it
I had another toploader sitting here, so I could measure from it without having to take the truck apart just yet.
With all the measuring done, the input shaft of the Ranger tranny is 3/4" longer than the toploader.
I searched in the junk and was lucky enough to find a piece of plate, just the right size.
I have another friend that is a Machinist, so he gave me some tips.I put a large piece of pipe in the Lathe and faced it to make it true.
I drilled a small hole in the plate where I found the center of the hole needed to be.
I then ran up the live center and pushed the plate against the pipe.
Then welded the plate to the pipe
Then I turned the center hole out to be a couple thou larger than the snout on the front of the tranny.
I removed the front bearing retainer off the old Toploader and machined a groove in the plate for it to fit.
This will align the bell housing perfectly with the tanny as the bell housing fits tight over this retainer
The heads of the bolts have to be countersunk below the surface of the plate for clearance, so off to KMS to buy a 1" endmill.
Used the live center on the lathe again to center it and piece of cake
Torched off the extra metal and ground it up.
I did need to turn down both the front and back surfaces to be sure they were perfectly parallel with each other.
Here is a pair of pics with the original and the new tranny with the adapter installed so you can see how they look compared to one another.
Last edited: