Project Menu
(click each Update if you wish to go directly there)
Update 1 - Intro & Body (just below)
Update 2 - Chop Part 1
Update 1 – Intro & Body
1932 Ford 3-Window Coupe
Automobile enthusiasts have a very diverse, somewhat inexplicable, cross section of their “likes”. That’s what makes the hobby interesting. Personally, I happen to like 1932 Fords (and Volvo PV544s if you have seen the other project) and have since before I had a driver’s license – more or less a lifelong passion which started with a model of a ’32 which won a hobby shop model building contest (assisted/inspired by my mentor and brother-in-law).
I have also had an opportunity to express that passion through a number of scratch-built 32’s that finished up with quite different characters in terms of their function and theme: one a clean, high tech 'glass 3-window coupe with all the bells and whistles, the other a very low tech 'glass roadster with some contemporary design elements but with basically a key and a headlight switch.
This car will be a straight-ahead interpretation - in a more traditional style (of which there are many I should add in case this doesn't match your idea of "traditional").
Design
Before getting started, I had already thought long and hard about how the car would ultimately look in EVERY detail. Like the roadster mentioned above, I asked my friend and graphic designer Matthew Labutte of Brightwork Studio if he would illustrate the car for me based on the detailed design specs I provided.
What resulted were the two illustrations included in this update: the basic illustration and a version with the car in a composition. Matthew chose to name the composition version “Redux” (as in rethinking or presented in a new way).
It will become clear over time how closely this design model echoes the real thing.
The Body
I came across the body in Calgary, Alberta, Canada while preparing for the first “Points West” Canadian Hot Rod Tour. It had flipped around between a few hot rod shops and was for sale. It is one of the very early Brookville 3-Window bodies which lacked a number of refinements of the current bodies (one example: the trunk lid, while having a hole for a handle, had no provision or opening for a latching mechanism in the lid or the valance).
Because it had sat around for so long, there was a fair amount of surface rust on the underside and in enclosed areas.
The photos accompanying this intro detail: As shipped from Brookville Roadster, the wood around and below the rear window (Note the installed window mechanism), door / jamb details, a good look at the complete underside of the body (We'll talk more about the trunk floor in a future update), all wood removed in preparation of upcoming work, detail of latch area, trunk inner rear quarter, trunk lid detail – inner, cowl vent detail, header detail, door detail, dash / cowl area detail, inside shot of rear turret and sail panel after removal of wood, floor detail and the passenger side “sail panel” marked up (details in upcoming articles).
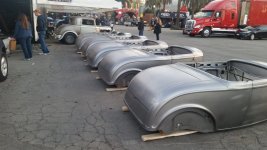
Shortly after acquiring the body, we decided to drive down to Brookville Roadster and had a great tour complements of Kenny Gollohan of Brookville.
Should you be interested in the photos from our visit to Brookville Roadster, you can check them out HERE.
Here are the first five photos. the balance can be viewed HERE.


(click each Update if you wish to go directly there)
Update 1 - Intro & Body (just below)
Update 2 - Chop Part 1
Update 1 – Intro & Body
1932 Ford 3-Window Coupe
Automobile enthusiasts have a very diverse, somewhat inexplicable, cross section of their “likes”. That’s what makes the hobby interesting. Personally, I happen to like 1932 Fords (and Volvo PV544s if you have seen the other project) and have since before I had a driver’s license – more or less a lifelong passion which started with a model of a ’32 which won a hobby shop model building contest (assisted/inspired by my mentor and brother-in-law).
I have also had an opportunity to express that passion through a number of scratch-built 32’s that finished up with quite different characters in terms of their function and theme: one a clean, high tech 'glass 3-window coupe with all the bells and whistles, the other a very low tech 'glass roadster with some contemporary design elements but with basically a key and a headlight switch.
This car will be a straight-ahead interpretation - in a more traditional style (of which there are many I should add in case this doesn't match your idea of "traditional").
Design
Before getting started, I had already thought long and hard about how the car would ultimately look in EVERY detail. Like the roadster mentioned above, I asked my friend and graphic designer Matthew Labutte of Brightwork Studio if he would illustrate the car for me based on the detailed design specs I provided.
What resulted were the two illustrations included in this update: the basic illustration and a version with the car in a composition. Matthew chose to name the composition version “Redux” (as in rethinking or presented in a new way).
It will become clear over time how closely this design model echoes the real thing.
The Body
I came across the body in Calgary, Alberta, Canada while preparing for the first “Points West” Canadian Hot Rod Tour. It had flipped around between a few hot rod shops and was for sale. It is one of the very early Brookville 3-Window bodies which lacked a number of refinements of the current bodies (one example: the trunk lid, while having a hole for a handle, had no provision or opening for a latching mechanism in the lid or the valance).
Because it had sat around for so long, there was a fair amount of surface rust on the underside and in enclosed areas.
The photos accompanying this intro detail: As shipped from Brookville Roadster, the wood around and below the rear window (Note the installed window mechanism), door / jamb details, a good look at the complete underside of the body (We'll talk more about the trunk floor in a future update), all wood removed in preparation of upcoming work, detail of latch area, trunk inner rear quarter, trunk lid detail – inner, cowl vent detail, header detail, door detail, dash / cowl area detail, inside shot of rear turret and sail panel after removal of wood, floor detail and the passenger side “sail panel” marked up (details in upcoming articles).
Shortly after acquiring the body, we decided to drive down to Brookville Roadster and had a great tour complements of Kenny Gollohan of Brookville.
Should you be interested in the photos from our visit to Brookville Roadster, you can check them out HERE.
Here are the first five photos. the balance can be viewed HERE.
Last edited: