We've
had good success with ididit and decided to use their column again.
We selected a plain steel column that will be painted. With column
in hand, and a spare steering wheel available, the first order
of business was to mock up a seating position.
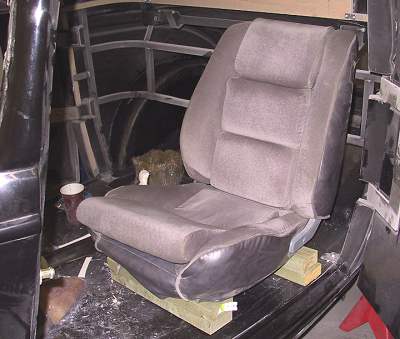
I'm
sure you've heard time and time again not to sit on a crate but
to simulate the seating postion with either the actual seat (or
frame) that you'll be using or a reasonable facsimile. We don't
have a frame, or definite plan for that matter, but we were loaned
a bucket seat that we raised up with 2 x 4's to create the correct
driving height.
Slick
or what? Not sure what this was out of but it did the trick.
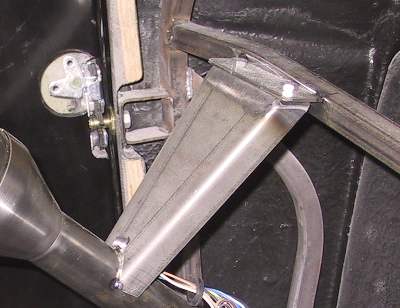
After determining the correct height/angle, a column drop was fabricated,
a small plate was welded to the dash-area crossmember
and the column drop was tacked to the column.
At the floor, a hole was drilled through the body to let the column
pass through.
The fabricated lower mount will ultimately be glassed to the body
so that no fasteners
will be visible on the firewall side. A square plate was fab'd and
bent to the contour of the
of the firewall/floor intersection and also drilled to accept the
column. The
small piece of tubing in the lower left will be attached to the
plate to become the
lower attaching point of the column.
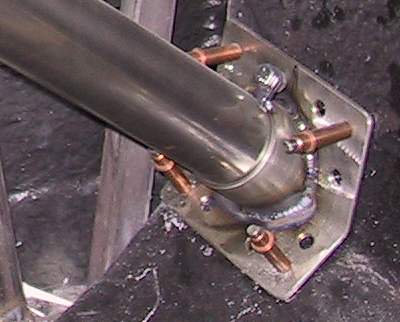
This is how things look a this point.
At
this point, the tubing has been welded to the plate and drilled
tabs
have been welded to the tubing and the column and bolted together
to secure the column. Cleco fasteners temporarily hold the plate
in place.
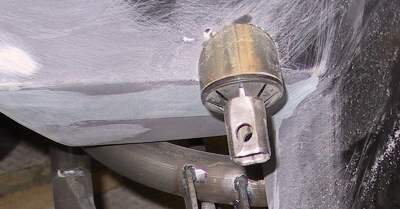
The
plate has been glassed to the floor/firewall to anchor the plate.
You can see the tabs with the bolt removed.
This
is how the column looks exiting the firewall.